
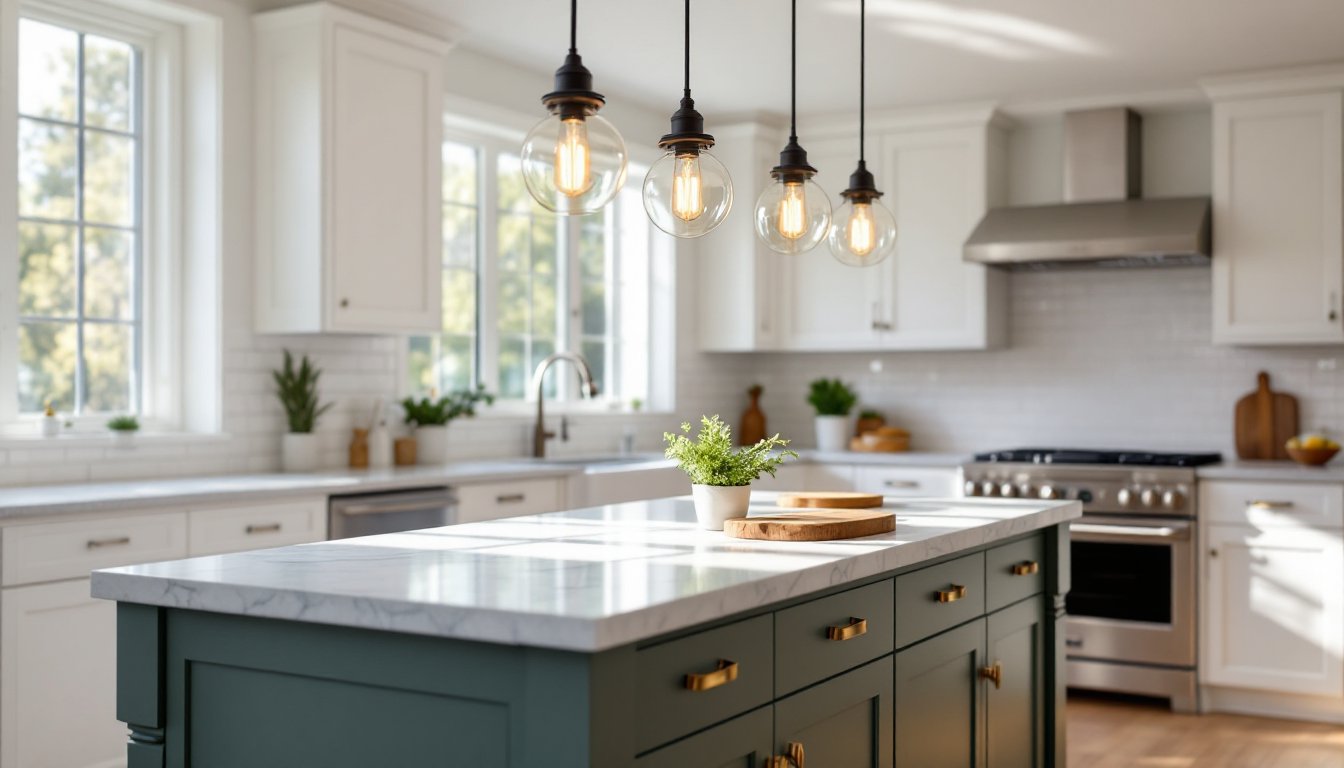
Farmhouse pendant lights over a kitchen island don’t just brighten up a workspace, they anchor the entire room with warmth, character, and functional style. Whether renovating an old home or softening a modern build, the right fixtures turn an island from a basic prep surface into the visual and practical heart of the kitchen. This guide walks through style selection, sizing formulas, installation considerations, and what actually works when hanging lights over the busiest spot in the house.
Table of Contents
ToggleKey Takeaways
- Farmhouse pendant lighting combines practical task lighting with visual focal-point appeal, transforming kitchen islands from basic prep surfaces into the heart of the kitchen with warmth and character.
- Hang pendants 30 to 36 inches from the countertop, and size each fixture by dividing island width by 2 to 2.5; islands under 4 feet need one large or two small pendants, while 5 to 7-foot islands suit two to three fixtures spaced 24 to 30 inches apart.
- Match farmhouse pendants with existing finishes by selecting one dominant metal (oil-rubbed bronze, matte black, or brushed nickel) and limiting total finishes in the kitchen to three to avoid a cluttered look.
- Install pendants on a dedicated switched circuit with LED-compatible dimmers to prevent flickering, and always verify electrical code compliance and obtain permits for new wiring to avoid future home-sale complications.
- Classic glass-and-metal combinations with seeded or milk glass shades work in any kitchen style, while rustic wood and industrial cage designs suit larger islands with exposed beams or ceilings 9 feet or higher.
Why Farmhouse Pendant Lights Are Perfect for Kitchen Islands
Kitchen islands demand task lighting that’s both practical and present. Farmhouse pendants deliver on both fronts with focused downlight for prepping, cooking, and eating, plus a sculptural presence that defines the island as a focal point.
Unlike recessed cans or track lights, pendants drop into the sightline and create visual layering. The open, airy profiles typical of farmhouse designs, cage frames, seeded glass, or bell shades, let light spread while keeping the look approachable rather than formal. This makes them equally suited to rustic farmhouse interiors and transitional kitchens that blend styles.
Farmhouse fixtures also tend to use Edison-style bulbs or clear glass that shows the filament, adding warmth in color temperature (2700K to 3000K) and a nostalgic glow. That softer light quality works well in kitchens where overhead lighting can feel stark or clinical.
From a practical standpoint, pendants are easier to install than chandeliers, more interesting than flush mounts, and adjustable in height, a key factor when you’re hanging fixtures over a countertop that sees everything from assignments to holiday baking.
Choosing the Right Farmhouse Pendant Style for Your Space
Farmhouse style is broad, spanning everything from reproduction schoolhouse globes to blackened iron cages. The right choice depends on island size, ceiling height, and the rest of the kitchen’s material palette.
Classic Glass and Metal Combinations
Glass shades paired with oil-rubbed bronze, matte black, or brushed nickel hardware are the backbone of farmhouse pendant design. Clear seeded glass or ribbed patterns diffuse light without blocking it, making them ideal for task lighting. Dome or bell-shaped glass shades, typically 8 to 12 inches in diameter, work well over standard-width islands (36 to 42 inches).
For a cleaner look, milk glass or frosted white shades soften the light and reduce glare, especially useful if the island doubles as a dining spot. These pair well with white shaker cabinets and subway tile but can feel too soft in kitchens that need contrast.
Metal finishes matter. Oil-rubbed bronze adds age and depth, black keeps things crisp and modern-farmhouse, and aged brass or antique copper lean into warmer, lived-in aesthetics. Match or complement existing cabinet hardware, faucet finishes, and appliance handles, mismatched metals can work, but it takes intention.
Rustic Wood and Industrial Elements
Wood-beam pendants, wire cages, and galvanized metal shades push further into rustic or industrial-farmhouse territory. These work especially well in kitchens with exposed ceiling beams, brick backsplashes, or reclaimed wood accents.
Industrial cage lights offer an open, utilitarian look that doesn’t block sightlines, important in open-concept layouts. They’re typically made from steel or iron with a powder-coat finish and house exposed bulbs. Pair them with vintage-style LED filament bulbs (60W equivalent, 800 lumens) for the look without the heat.
Wood bead chandeliers or fixtures with weathered wood details add texture but can feel heavy in smaller kitchens. Reserve these for islands at least 6 feet long with ceilings 9 feet or higher. They also collect dust in the grooves, so factor in maintenance.
When mixing materials, limit yourself to three finishes across the kitchen: one dominant (cabinetry or walls), one accent (hardware and fixtures), and one highlight (often the island pendant). More than that and the space starts to look unresolved.
How to Determine the Perfect Size and Spacing
Getting the scale and placement right prevents the most common pendant mistakes: fixtures that are too small to matter, too large to clear heads, or spaced so awkwardly they throw uneven light.
Pendant diameter: As a rule, divide the island width (in inches) by 2 to 2.5 to get the maximum diameter for each pendant. For a 42-inch-wide island, that’s roughly 17 to 21 inches per fixture. If hanging multiple smaller pendants, each one can be 10 to 14 inches in diameter.
Number of pendants: Islands under 4 feet long typically take one large pendant or two small ones. Islands 5 to 7 feet comfortably fit two to three fixtures. Go with three or more on islands 8 feet or longer, spacing them evenly with about 24 to 30 inches between centers.
Hanging height: Measure 30 to 36 inches from the island countertop to the bottom of the pendant shade. This provides clearance for seated diners and standing cooks without blocking sightlines across the room. For islands in kitchens with lower ceiling heights, shorter pendants with wider shades keep the look proportional.
Ceiling height adjustments: Standard 8-foot ceilings leave little room for drama, stick to compact fixtures (8 to 10 inches tall) hung at the shorter end of the range. In kitchens with 10-foot or taller ceilings, you can use larger, more dramatic fixtures and hang them slightly lower to bring visual weight down.
Always mock up placement before drilling. Use painter’s tape on the ceiling to mark centers, then hang cardboard templates or the actual fixtures (unplugged) from temporary hooks to check clearance, balance, and light spread.
Installation Tips for Kitchen Island Pendant Lighting
Installing pendant lights over a kitchen island is straightforward if there’s already a junction box in place. If not, running new wiring may require cutting into drywall and working inside the ceiling, often a job for a licensed electrician, especially if you’re adding circuits or working near load-bearing members.
Electrical requirements: Most pendant lights run on standard 120V household current and connect to a switched circuit. Check the wattage rating on the fixture and ensure the circuit isn’t overloaded (typically 15 amps or 1,800 watts max per circuit). LED fixtures draw far less power, making it easy to run multiple pendants on one switch.
Junction box placement: For multiple pendants, you’ll need a junction box centered over each fixture location, or a single box with a multi-light canopy that branches out. If boxes aren’t already installed, you’ll need attic or crawl space access to fish wire. This is where an electrician saves time and prevents code violations.
Permits and codes: Any new wiring or circuits typically require a permit and inspection per the National Electrical Code (NEC) and local amendments. Replacing an existing fixture on the same box usually doesn’t, but verify with your municipality. Getting caught without permits during a home sale or insurance claim creates headaches.
Tools and materials: You’ll need a voltage tester, wire strippers, screwdrivers (flathead and Phillips), wire nuts, and possibly a step ladder or platform ladder for ceiling work. Keep a second person on hand to hold fixtures during hanging, pendants are awkward and glass shades break easily.
Step-by-step (replacing an existing fixture):
- Turn off power at the breaker, not just the switch. Verify with a voltage tester at the junction box.
- Remove the old fixture and inspect the box. If it’s loose or damaged, reinforce or replace it. Pendants can weigh 5 to 15 pounds, and the box must be securely fastened to a ceiling joist or brace bar.
- Match wire colors: black (hot) to black, white (neutral) to white, and bare copper or green (ground) to the box ground. Twist connections with wire nuts and wrap with electrical tape.
- Attach the mounting bracket per the fixture instructions, then connect the fixture canopy.
- Adjust the cord or rod length. Most pendants come with excess that you shorten by rethreading or coiling inside the canopy. Measure carefully, cutting cord is permanent.
- Install bulbs and shades, restore power, and test the switch.
Dimmer compatibility: Most farmhouse pendants work with standard incandescent dimmers, but LED bulbs require LED-compatible dimmers to avoid flickering or buzzing. Check bulb packaging and dimmer specs, mismatches are the number one complaint with retrofitted lighting.
If the island sits far from existing ceiling boxes, or if you’re installing pendants in new construction, plan rough-in wiring before drywall goes up. Kitchen lighting layouts benefit from separate switched circuits for pendants, under-cabinet lights, and ambient ceiling fixtures, allowing layered control.
Conclusion
Farmhouse pendant lighting turns a kitchen island into a functional, finished focal point without overcomplicating the design. Getting the style, size, and installation details right means the fixtures do their job, task lighting, ambiance, and visual interest, without requiring a second round of adjustments or professional fixes. Measure twice, wire carefully, and choose designs and finishes that complement the rest of the space. The result is a kitchen that feels cohesive, well-lit, and built to last.


